
This isn’t a deep technical post, but more of an attempt to increase awareness of a utility created by Microsoft’s Commercial Software Engineering (CSE) team that allows data engineers to automatically detect, anonymize and decrypt sensitive data fields as part of their ETL pipelines.
The tool is Presidio, and, as described in the main site – delivers the following capabilities:

The link provided above goes into extensive details about the product, including samples, config etc, so I won’t repeat here. There is also an Azure Data Factory gallery template that shows you how to get up and running with Presidio using that service and Azure Databricks.
What the gallery doesn’t cover, and also isn’t in the main site, is how to do this if you’re using Azure Synapse Analytics as your primary analytics platform. Specifically, if you’re using Synapse Workspaces, pipelines, Spark/Dedicated/Serverless pools etc – how can you leverage Presidio all under the one service?
This article specifically covers that scenario, and will show you examples on how to detect, anonymise and decrypt PII data using Presidio and Synapse Spark Pools.
Prerequisites
You’ll need the following services already created –
- A Synapse Workspace
- A Synapse Spark Pool Provisioned in the above workspace
- Some data!
You’re good to go!
Packages
Before you start, you’ll need to upload the relevant Presidio packages to the cluster as they’re not included the base spark image provided by Synapse. There are a few ways to do this, but I did it via the Workspace package option on this occasion –
- Download the whl files from PyPi
- Upload them to the Synapse Workspace
- Deploy them to the relevant spark pool
- Confirm the packages are installed and useable
1 – Download the whl files from PyPi
You will need both the anonymiser and analyzer whl packages. Download them from here –
https://pypi.org/project/presidio-analyzer/#files
and
https://pypi.org/project/presidio-anonymizer/#files
respectively.
Note, the presidio package also needs a specific language pack to work. Whilst the existing docs show you can do this by using the python command line, currently there isn’t a way to do this with Synapse Spark pools. So instead, I downloaded the language pack as another whl file, and installed it the same way.
2 – Install on the Synapse Workspace
Install your whl packages as per the guidance here – https://docs.microsoft.com/en-us/azure/synapse-analytics/spark/apache-spark-manage-python-packages#install-wheel-files

3 – Deploy to the Relevant Spark Pool
Navigate to your spark pool and apply the packages there and as per the instructions here
4 – Verify your package(s) have installed correctly.
Create a notebook attached to your cluster, and run the following command. You should see your libraries there, ready for use.
import pkg_resources
for d in pkg_resources.working_set:
     print(d)
You should see your packages installed on the cluster –

Usage
With your cluster ready to do. You’re now ready to use Presidio with your own datasets. In the examples below I highlight both detection and anonymisation as one spark function.
For the simple examples below I’ve created a simple data file containing PII information based on UK taxonomies – so Name, Date Of Birth and NHS Number. As I’ve used an actual NHS number format I’ve hidden most of the text in the snippet –
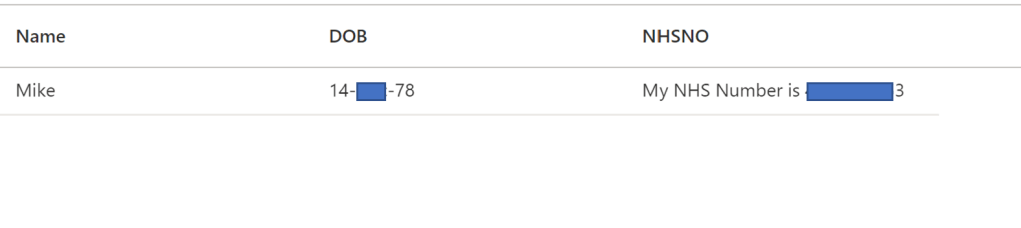
From here, I follow the main example as shown here. The steps involved importing the package, building a function that takes the text to be detected and anonymised, then shows the anonymised text as an output.
First of all, we import the sample file into a dataframe:
df = spark.read.load('abfss://<CONTAINER>@<STORAGEACCOUNT>.dfs.core.windows.net/Raw/preanondata/data.csv', format='csv'
## If header exists uncomment line below
, header=True
)
This contains the data as shown above –
The field I’m interested in anonymising in this demo is NHSNO, and contains a 10 digit number in the standard UK NHS format.
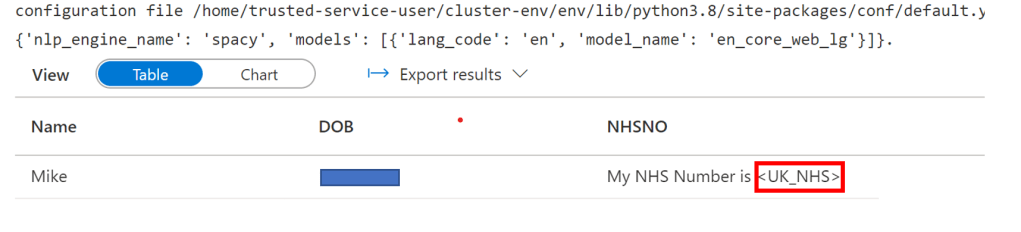
The next cell then calls the actual spark code that parses the text, passing the NHSNO column as an input. Presidio detects the NHS Number in the string and anonymises it, showing the anonymised string in the outputted dataframe:
anonymized_column = "NHSNO" # name of column to anonymize
analyzer = AnalyzerEngine()
anonymizer = AnonymizerEngine()

# broadcast the engines to the cluster nodes
broadcasted_analyzer = sc.broadcast(analyzer)
broadcasted_anonymizer = sc.broadcast(anonymizer)

# define a pandas UDF function and a series function over it.
def anonymize_text(text: str) -> str:
    analyzer = broadcasted_analyzer.value
    anonymizer = broadcasted_anonymizer.value
    analyzer_results = analyzer.analyze(text=text, language="en")
    anonymized_results = anonymizer.anonymize(
        text=text,
        analyzer_results=analyzer_results,
        operators={
            "DEFAULT": OperatorConfig("replace", {"new_value": ""})
        },
    )
    return anonymized_results.text


def anonymize_series(s: pd.Series) -> pd.Series:
    return s.apply(anonymize_text)


# define a the function as pandas UDF
anonymize = pandas_udf(anonymize_series, returnType=StringType())

# apply the udf
anonymized_df = df.withColumn(
    anonymized_column, anonymize(col(anonymized_column))
)
display(anonymized_df)
The output from the above cell shows the detected entity and anonymised text (highlighted in red) –
Hopefully this mini guide gives you some insights into how you can use the Presidio package with Synapse Spark and build your own anonymisation routines.
What I’ve shown above is just one way of doing it, and specifically with Synapse Spark (as it wasn’t shown in the original docs). However there are many other ways of using the utility, such as with Data Factory or a web service. There are also many other PII entities you can use with the utility, along with the ability to create your own PII detection routines.
Finally, whilst anonymisation routines are key elements of a modern data integration pipeline, they should be regarded as just one layer of protection along with many others that you should implement.
As always, any questions please get in touch!
